Under-Sink Bathroom Storage: Measure Pipes Before You Organize

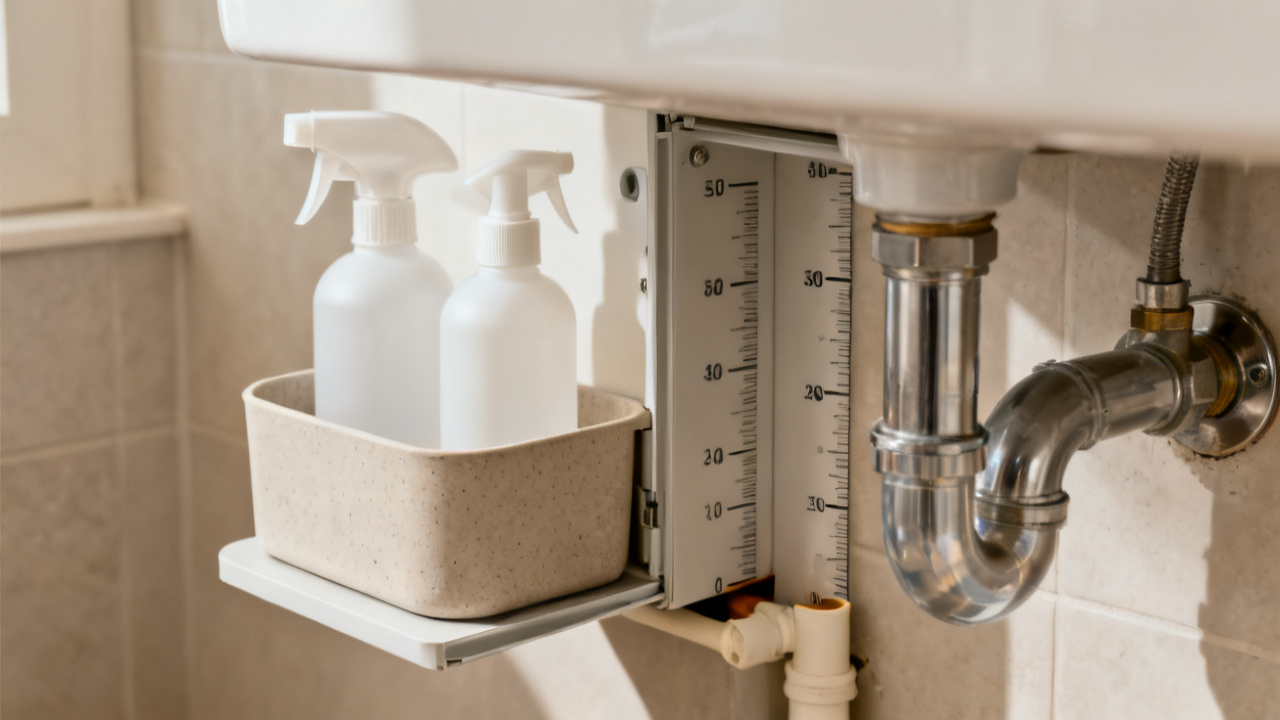
Under-sink pipe clearance map

Home Organization Systems

Before you start buying under-sink organizers or rearranging your bathroom vanity storage, three things decide if your setup works long-term: accurate pipe measurements, enough clearance for plumbing maintenance, and zoning that fits your actual daily use. You’ve probably already run into the most common frustration here: picking up a pre-made organizer that won’t fit around off-center pipes or a bulky P-trap, or shoving too many items under the sink only to bump pipe connections and end up with hidden cabinet water damage later. This step-by-step guide walks you through exactly what to measure first, how to carve out usable storage space even in small 24-inch powder room vanities, and how to set up your storage so you never have to move half your supplies just to check for leaks.

Measuring under-sink bathroom cabinet pipes

Before you start, three things decide if your under-sink organizer will actually fit without creating plumbing issues: your pipe dimensions, required safety clearances, and your vanity’s exact interior measurements.

Beginner-friendly step-by-step measurement process

You don’t need specialty tools to get accurate measurements that fit your exact cabinet and plumbing setup.

Required prep tools

  • Standard retractable tape measure (cloth flexible tape works better for awkward curves if you have one)
  • Scrap paper and pen to log measurements as you go

Pipe outer diameter measurement steps

Most quick online guides skip this specific step, which leads to ill-fitting organizers or pipe protectors. Wrap your tape measure around the widest part of each pipe (both hot/cold supply lines and the U-shaped P-trap drain) to get the circumference. Divide that number by 3.14 to get the exact outer diameter. Skip guessing by holding a ruler up to the pipe face—you’ll almost always end up measuring the inner opening instead of the full outer width that organizers or foam covers need to fit around.

Pipe height positioning measurement steps

Start at the bare cabinet floor, not any existing shelf or liner, and measure straight up to the bottom of the lowest hanging pipe. Next, measure from the back of the cabinet interior to the front edge of the pipe that sticks out the furthest into the cabinet space. Note if any pipes are mounted off-center to one side of the cabinet—this is a common quirk if your basin was plumbed to fit a small vanity footprint, and it will rule out symmetric pre-cut organizers if you don’t account for it.

Code-compliant critical measurement requirements

Leave a minimum of 2 inches of clearance between any stored items or organizers and all exposed pipes. This prevents items from bumping against pipe connections and causing slow leaks you won’t notice until you have damp cabinet flooring. You also don’t need to adjust pipe positioning with extra drain offsets just to fit a fancy organizer—altering existing plumbing solely for storage can introduce unnecessary leak risk if not done by a licensed plumber.

Common measurement mistakes to avoid

The most frequent error is only measuring the cabinet’s wall space, not accounting for how far pipes protrude into the usable storage area. This leads to buying organizers that you can’t push all the way back against the wall, wasting valuable front storage space. Another easy-to-miss mistake is measuring once instead of twice for every dimension—even a ½ inch discrepancy can make a pre-made organizer completely unusable. Don’t forget to account for the P-trap’s full size, either; it always holds standing water, so you can’t rest any heavy items directly under or against it.

Mandatory pre-shopping measurements

Jot these four numbers down before you browse any storage solutions, and bring them with you if you shop in person:

  1. Outer diameter of each exposed pipe (hot/cold supply lines and P-trap drain)
  2. Height from the bare cabinet floor to the bottom of the lowest hanging pipe
  3. Depth from the back of the cabinet interior to the front edge of the furthest protruding pipe
  4. Full interior width, depth, and height of the cabinet itself

Under-sink storage safety rules

Code-compliant installation restrictions

Front clearance mandates

When you’re shopping for under-sink organizers, don’t only measure the interior of your vanity cabinet. You need to leave 21 inches of clear, unobstructed space directly in front of the cabinet door at all times, even when pull-out drawers or trays are fully extended. A common mistake is ordering a deep pull-out organizer that juts out far enough to block your bathroom walkway when open, creating a tripping hazard and violating residential accessibility guidelines for bathroom spaces. If your vanity is in a tight powder room, opt for shallow, door-mounted racks instead of deep pull-outs to preserve this clearance.

Prohibited plumbing modifications

Don’t cut, re-angle, or add extra offsets to your drain pipes or supply lines just to fit a larger storage system. Even small adjustments to the U-shaped drain trap can throw off its water-seal function, letting sewer gases seep into your home or creating slow drains that clog frequently. If the pipes in your vanity are awkwardly placed, work around them with split organizers or custom cut foam inserts instead of modifying plumbing; you’ll avoid the risk of hidden leaks that can rot your cabinet base before you spot dampness.

Non-negotiable storage guidelines

Approved stored items list

Stick to these low-risk, frequently used items for under-sink bathroom storage to minimize damage risk:

  • Cleaning supplies formulated for bathroom surfaces, stored in sealed, leak-proof containers
  • Extra toilet paper, sealed in plastic packaging to protect from moisture
  • Disposable cleaning wipes, sponges, and scrub brushes
  • Travel-sized grooming products you use only occasionally Never store flammable aerosols, electronic devices, food items, or fragile glass containers under your sink. All stored items should be placed inside a single, rigid plastic tray that sits under the drain trap, so any small, slow leaks will be contained before they soak into the cabinet floor. Leave at least 1 inch of empty space between all storage containers and exposed pipes to avoid repeated bumping that can loosen pipe connections over time.

Small vanity storage zoning

Pre-zoning preparation

Home Organization Systems

Approved item curation steps

First, sort all items you’re considering storing under the sink before purchasing any organizers. Separate out non-approved items first: flammable aerosols, electronics, paper products that will mildew if exposed to dampness, and any food or pantry goods. Keep only bathroom-specific cleaning supplies, waterproof grooming overflow, and backup toiletries that won’t be damaged by occasional minor moisture.

Maintenance access reservation guidelines

Most people skip this step entirely, leading to torn organizers or missed leak checks down the line. You need to leave a minimum of 3 inches of clear space on all sides of exposed pipes, and a 6-inch wide unobstructed path directly to the U-bend (the part of the drain that always holds water). This lets you easily check for drips, rust, or puddles every 3 to 4 weeks without moving half your stored items to reach the plumbing.

Recommended functional storage zones for standard pipe layouts

U-shaped top drawer zone

If your vanity is plumbed with a centered drain, a pre-made or custom-cut U-shaped top drawer fits around the pipes to hold small, frequently used items like travel toiletries, toothbrush replacements, or hair ties. If your drain is offset to one side (a common edge case many generic organizers don’t account for), you can trim a low-cost foam drawer insert to fit around the pipe instead of buying a specialized U-shaped drawer to cut down on unnecessary cost.

Step-by-step zone mapping process

  1. Measure the full width, depth, and height of the cabinet interior first, marking the exact location of all hot/cold water lines and the drain pipe on a quick sketch.
  2. Mark off the required maintenance access space first on your sketch, before assigning any storage zones.
  3. Assign the most accessible (front, high) space to items you reach for at least once a week, and the back, lower space to backup items you only use every few months.

Recommended adjustable, space-efficient storage products

The best products work with your existing pipe layout, not against it.

Product Type Best For Tradeoff
Expandable divided tray Small grooming items, skincare overflow Only fits flat, unobstructed sections of the cabinet floor, can’t be used around tight pipe clusters
Tension rod + over-the-door hook set Lightweight cleaning supplies, washcloths Requires at least 1 inch of clearance on both sides of the cabinet interior to install

If you’re worried about stored items bumping pipes and causing accidental damage, wrap exposed pipes in ¼-inch thick foam insulation before installing organizers. No special tools are required for the wrap, and it adds an extra layer of leak protection for nearby stored goods.

Under-sink cabinet maintenance

Common leak points

The most frequent source of small, hidden leaks under your bathroom sink is the U-shaped P-trap, which holds standing water at all times to block sewer gasses from entering your home. Joints where the trap connects to the main drain line, and where hot and cold supply lines meet the faucet tailpiece, are also common failure points, especially if they get jostled by stored items when you reach for supplies. Even small, repeated bumps can loosen sealant or threaded connections over time, leading to slow drips you won’t notice immediately.

Early wear and damage detection signs

Visible warning signs

Faint damp spots on the cabinet floor that don’t line up with a recent spill, rust discoloration on pipe surfaces, or peeling laminate/softened wood on the cabinet base are all clear red flags. You may also see tiny puddles around pipe joints after you run hot water for several minutes, as expanded metal can widen small gaps in loose fittings.

Olfactory warning signs

Don’t ignore persistent musty or mildew smells coming from the cabinet, even if you can’t see any moisture. Slow, micro-drips can soak into the cabinet subfloor or the back of the vanity where you can’t see, fostering mold growth long before visible water appears. A faint metallic odor can also signal early corrosion in older metal pipes that haven’t yet started leaking visibly.

Post-storage installation safety checks

After you install any under-sink organizers, pull-out drawers, or storage bins, first confirm there is at least 1 inch of clearance between every storage surface and all pipes. No organizer should press directly against pipe joints, as constant pressure can wear down seals over time. Test pulling out every drawer and reaching for back-of-cabinet items to make sure you don’t bump any fittings when accessing supplies. If you use a drip catch tray under your storage, confirm it extends fully under the entire P-trap area to catch any small drips before they hit the cabinet floor.

Routine maintenance best practices

You don’t need specialized tools to keep your under-sink cabinet in good shape, and a consistent quick routine will catch issues long before they turn into permanent cabinet damage:

  • Do a 30-second visual and sniff check every 4 weeks when you restock grooming or cleaning supplies
  • Wipe down pipe surfaces every 3 months to remove dust and condensation that can hide early rust spots
  • Empty the entire cabinet once per year to inspect the full floor and back wall for hidden moisture damage A common mistake people make is only checking for leaks when they see visible water on the outside of the vanity. By that point, the underlying cabinet material has usually already sustained permanent water damage that requires full replacement.

FAQ

How do I get accurate under-sink pipe measurements to pick the right organizer without hiring a plumber?

Grab a flexible retractable tape measure, wrap it around each pipe (supply lines and P-trap) to get circumference, then divide by 3.14 to get the exact outer diameter. Also measure from the bare cabinet floor to the lowest hanging pipe, and from the cabinet back to the front edge of the furthest protruding pipe. Jot all numbers down before browsing organizers.

I have a 24-inch wide powder room vanity with off-center pipes—can I still set up functional under-sink storage?

Yep, skip full-width pre-cut organizers that only fit centered plumbing. Opt for split expandable trays that fit on either side of the offset pipes, plus over-the-door racks for lightweight items like cleaning wipes. Follow this year residential accessibility rules by leaving 3 inches of clear space around all pipes for maintenance access, and 21 inches of front clearance when organizers are extended.

How much usable storage space can I expect from a standard 30-inch under-sink bathroom vanity after accounting for pipes and safety clearances?

For a standard 30-inch vanity, you’ll typically have 18 to 22 inches of usable width, 10 to 14 inches of depth, and 12 to 16 inches of height once you account for pipe protrusions, the 2-inch clearance rule around all plumbing, and reserved maintenance access space. Prioritize high-access front zones for items you use weekly to maximize that space.

What’s the most common under-sink organization mistake that leads to unexpected plumbing issues?

The top mistake is installing organizers that press directly against pipe joints or don’t leave enough clearance around the P-trap. Repeated bumping from pulling out bins or reaching for supplies can loosen threaded connections or wear down seals over time, leading to slow hidden leaks that rot cabinet bases before you spot dampness.

About the author

QuickSpace Living is an independent home-organization blog. Our contributors organize their own small homes and rentals and write practical, tested guides on storage, decluttering, and household routines. This is general home-organization guidance, not professional advice.


About the author
QuickSpace Living is an independent home-organization blog. Our contributors organize their own small homes and rentals and write practical, tested guides on storage, decluttering, and household routines. This is general home-organization guidance, not professional advice.

Scroll to Top