Small-Space Charging Station: Keep Cables Off the Floor

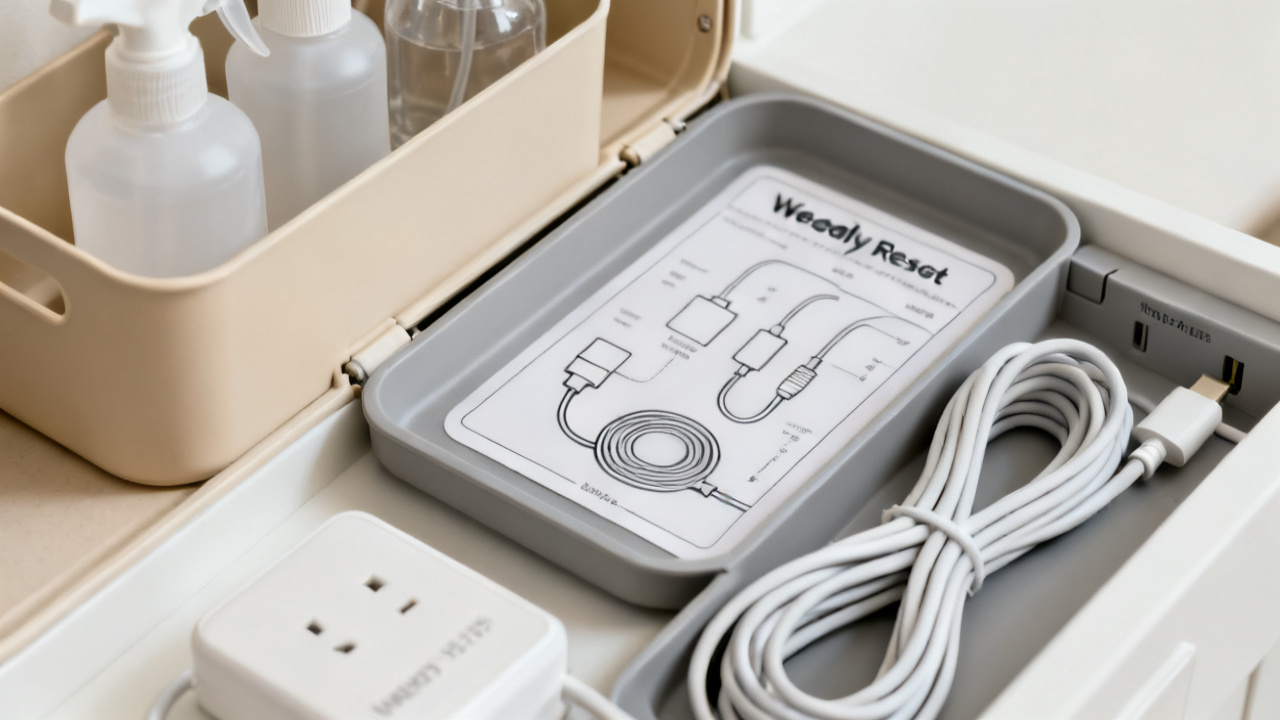
Charging tray layout for small apartments

Small-Space Storage

Option A: Your current charging setup, where tangled cords spill across your only free counter space, bulky chargers knock your phone off the edge, and you can never find the right smartwatch cord when you’re running late. Option B: A low-effort, renter-friendly charging zone that fits in under 1 square foot of space, cuts clutter completely, and eliminates common fire risks from overheated hubs or frayed cords. This piece walks you through 5 simple this year steps to build that second setup, no drilling or expensive specialty organizers required. You’ll get exact measurements for shelves and hubs, clear tradeoffs for DIY vs pre-made kits, and a 10-minute weekly reset routine to keep your station clutter-free long-term, even if you share a tiny studio with a roommate and multiple devices to charge. Looking to set up a clutter-free charging station for your small rental space? You have two straightforward paths to choose from: build a custom DIY version from supplies you likely already own, or pick up a pre-made unit that requires zero assembly out of the box. This guide covers all the supplies, setup steps, and routine tips to make either option work for your space, no drilling or permanent modifications required.

Essential Budget-Friendly Space-Saving Supplies

No-drill adhesive wall-mounted charging shelves

Mount these 4 to 5 feet above your most frequently used charging surface (kitchen counter, entryway desk, or nightstand) to reclaim all usable surface real estate, no landlord sign-off required. Skip shelves narrower than 10 inches if you regularly charge a full-size tablet or portable speaker; narrow models will leave larger devices hanging over the edge, prone to falling if you bump the wall. Most adhesive shelves hold up to 5 pounds, which works for 3 to 4 small devices plus a charging hub, but avoid stacking heavy 20,000 mAh power banks on them long-term — the adhesive bond will weaken faster with consistent excess weight.

Compact multi-port USB charging hubs

Look for hubs under 3 inches wide if you plan to tuck them into a shelf or tight cabinet compartment. Opt for models with a mix of USB-A and USB-C ports to skip carrying extra adapters for older and newer devices. A common trap here is buying the highest port count hub you can find: 6+ port hubs generate noticeable heat when every port is in use, so don’t tuck them into fully enclosed, unventilated storage spaces to reduce overheating risk. If you only charge 3 to 4 devices at a time, a 4-port hub is more than enough, and runs far cooler.

Reusable cord management fasteners

These work far better than one-time zip ties for household charging setups, since you can rearrange cords easily when you get a new device or shift your charging zone. Leave 2 inches of slack between the fastener and the device end of the cord to avoid straining the connector when you pick up a phone or tablet mid-charge.

Fastener type Best for Drawback
Velcro wrap fasteners Thick laptop or power tool charger cords Loosen easily on thin phone or smartwatch cords
Silicone rubber snap fasteners Thin device charging cords Stretch out permanently if used on cords thicker than 5mm

Compact lidded cable storage boxes

Most models are 6 to 8 inches square, small enough to tuck on a lower cabinet shelf, under a desk, or on the top shelf of an entryway table. They hide bulky power strips and excess cord length out of sight, without blocking access to ports if you need to plug in a rare device. Don’t buy a box without pre-cut side exit slots for cords; you’ll end up propping the lid open permanently, defeating the clutter-reduction purpose. If you have less than 1 square foot of free counter or desk space for charging, skip the storage box entirely. Pair a wall-mounted shelf with a 4-port hub and silicone fasteners for a zero-surface-space setup that works for even the smallest studio apartments.

Renter-Friendly Step-by-Step Setup

Pre-setup safety preparation

You don’t need any special tools to get started, but a quick pre-check avoids common fire hazards. First, test the wall outlet you plan to use by plugging in a small device like a lamp to confirm it works, and check for visible cracks or discoloration on the outlet plate. Never use an outlet that feels warm to the touch before you plug anything in. A common misstep here is planning to daisy-chain your charging station off another power strip or extension cord—this doubles the risk of overheating, so skip that setup entirely.

Low-impact location selection

You have two solid renter-friendly placement options that require zero drilling or permanent modifications.

Placement option Accessibility Clutter visibility Heat risk Renter modification needed
Kitchen counter corner 10/10 (easy to grab devices mid-meal) High (out in open) Moderate (keep 12in from small heat-producing appliances like toasters) None
Entry coat closet top shelf 7/10 (grab phones and headphones on your way out) Low (hidden behind closed door) Low (no nearby heat sources) None (uses existing shelf)

Skip any spot within 6 inches of a sink or other water source, even if it feels convenient.

Supply gathering

You won’t need to buy fancy organizers to make this work.

  • 1 surge-protecting power strip with a maximum of 6 ports (oversize strips waste valuable small-space real estate)
  • Reusable hook-and-loop cable ties (single-use plastic ties work, but are harder to adjust if you add a new device later)
  • A shallow tray or wooden board 8-12 inches wide, to contain all station components
  • Optional: peel-and-stick adhesive cable clips (no nails, so they won’t damage counters or shelves)

Safe station assembly

Plug the power strip directly into your pre-checked wall outlet. Set your tray on the chosen surface, then place the power strip at the very back of the tray with the ports facing out toward you. Don’t tuck the power strip under stacks of mail, books, or throw blankets to hide it—trapped heat builds up fast and raises fire risk. Leave at least an inch of empty space around the sides of the power strip for airflow.

Clutter-reducing cable organization

First, cull your chargers. Only plug in the ones you use at least once a week. Stash rarely used chargers (like old camera or power tool chargers) in a separate small bin in your pantry for when you need them, so they don’t take up space or add extra cords at your active station. Wrap any excess cable length (most charging cords are 3-6 feet long, but you only need 6-12 inches to reach the tray) and secure it with a cable tie. If you’re using adhesive clips, stick them to the front edge of the tray to hold each cable end in place so they don’t slip behind counters or shelves. Once a week, take 2 minutes to wipe dust off the charger ports with a dry cotton swab and check for fraying on cable ends to catch small issues before they become hazards.

Small-Space Layout Ideas

Under 1 square foot entryway console charging station

This tiny footprint fits even the narrowest entryway consoles, and keeps your phone, keys, and earbud case all in one spot as you head out the door. Most people make the mistake of choosing a unit that sits flush with the console’s front edge, leading to cords hanging down that snag on shoes or bags as you pass. Leave at least half an inch of space between the unit and the console edge to tuck cords out of the way.

DIY build supplies and steps

You don’t need specialty tools for this build, and you can repurpose supplies you already have on hand:

  1. Small 11×11 inch lidded plastic or wooden storage box (the kind you might already use for office supplies)
  2. 1 surge-protecting power strip with 4 to 6 ports
  3. Reusable hook-and-loop cable ties
  4. Non-slip grip liner cut to match the box’s top edge
  5. Drill with a 1-inch hole saw bit (or a hand-held rotary tool if you don’t have a drill) Build steps are straightforward:
  6. Drill a single 1-inch hole in the back of the box 1 inch from the bottom edge to feed the surge protector cord through to the nearest wall outlet.
  7. Secure the surge protector to the box’s interior base with cable ties so it doesn’t shift when you plug devices in.
  8. Stick the grip liner to the box’s top edge to keep devices from sliding off mid-charge.

Pre-made option setup instructions

Pre-made 10×10 inch entryway charging units often come with a built-in shelf for phones and integrated USB ports, so no assembly is required. Skip the common mistake of pushing the unit flush against the wall. Leave a 1-inch gap to prevent the power plug from crimping, which can cause overheating over time. Tuck any excess cord behind the console to keep the space looking tidy. Use this quick comparison to pick the right option for you:

Metric DIY Build Pre-Made Option
Footprint 11×11 inches (under 1 sq ft) 10×10 inches (under 1 sq ft)
Upfront effort 15 minutes of basic drilling and assembly 2 minutes of plugging in and positioning
Customization Can paint or decal the box to match your entryway decor Limited to pre-designed colors and finishes
Upfront cost Low (uses household supplies you may already own) Moderate (pre-built for immediate use)
Maintenance Wipe down with a damp cloth weekly, tighten cable ties every 6 months if needed Wipe down with a damp cloth weekly

Under-cabinet kitchen charging station

This setup hides all charging cords inside your upper kitchen cabinets, so you don’t have a mess of wires cluttering your counter space while you cook or prep meals. Most people install the power strip directly on the cabinet floor, but mounting it 2 inches up the back interior wall leaves extra space for larger devices like portable blenders or electric wine openers to charge alongside phones and tablets.

Required supplies

You won’t need to drill any holes in your cabinets for this setup, so it’s rental-friendly:

  1. No-drill adhesive mounting tape rated to hold up to 10 pounds
  2. Slim 4-port USB charging hub (under 3 inches wide)
  3. Silicone snap cord fasteners for thin device cords
  4. 8×10 inch shallow plastic tray to catch crumbs and keep components contained Once you’ve installed the unit, add a 30-second weekly check to your routine: wipe down the plastic tray to catch crumbs, and inspect all cords for fraying to avoid overheating risks.

Weekly Reset Routine

Small-Space Storage

Full station emptying and initial tidy

Skip the common habit of wiping around cords that are still plugged in. Unplug every device, cable, and power strip from your charging nook first, even the items you use every single day. Wipe the entire surface of your station (whether it’s a counter nook, shelf, or cabinet insert) with a dry microfiber cloth to pick up dust and crumbs before you start sorting. For a standard 12×18 inch small-space charging zone, this step takes less than two minutes. Avoid wet cleaning products entirely here; moisture near electrical outlets or charger components creates unnecessary risk.

Unused or damaged cable removal

Sort all your unplugged cables into three quick piles: keep, toss, store elsewhere. Use the 10-second rule for the keep pile: if you can’t name exactly which device the cord pairs with in 10 seconds, it doesn’t belong in your active station. Toss any cords with frayed insulation, bent connector pins, or cracked plastic housings immediately. Oklahoma City Fire notes that frayed charging cords are a common cause of avoidable apartment fires, so don’t hang onto damaged cables for "just in case" use. Cords for devices you only use occasionally (like travel power banks or portable speaker chargers) go in the store elsewhere pile to put with your off-season or travel supplies.

Labeling and organization refresh

You don’t need a fancy label maker for this step — masking tape and a permanent marker work just as well for small household use. The mistake most people make here is labeling the back end of the cable, near the plug that goes into the wall or power strip. Instead, write the device name (or a household member’s first initial for shared cables) on the side of the label that faces you when the cable is plugged into the station. That way you never have to yank cords out to find the right one for your phone, tablet, or smart watch.

Safety hazard inspection

First, check the wall outlet your charging station plugs into. Look for faint discoloration around the prong slots, or a faint burning smell when you get close to it; both are signs of arcing, which is a serious fire risk. If you spot either, stop using the outlet immediately and contact your property maintenance team if you rent, or an electrician if you own your home. Next, check your power strip if you use one: never daisy chain a second power strip or extension cord off of it, even if you need more ports. This is an extremely common, underdiscussed risk in small apartments where wall outlets are scarce. Run your hand along the full length of each cable you’re keeping to feel for bulges or small cracks you might have missed during the removal step.

Layout optimization and non-charging item removal

Only put back the cables you use at least once a week. A standard 12×18 inch counter charging station fits 4 to 5 active cables comfortably without crowding; if you need more capacity, add a small under-cabinet hook rack for less frequently used active cables so they don’t pile up on the counter surface. Toss or relocate any non-charging items that accumulated on the station over the week: junk mail, lip balm, snack wrappers, or loose change don’t belong here, and they increase the risk of items falling into outlets or blocking vent slots on charging blocks.

Electrical Safety Guidance

Maximum safe device load for low-wattage personal device charging

Standard 120V US household outlets on 15A circuits can handle a maximum of 1800W total, but you should cap continuous use (like overnight charging of devices) at 80% of that, or 1440W, to prevent overheating. Most phone chargers pull 15W or less, but laptop chargers can pull 60 to 100W each, and large portable power banks can pull up to 150W while charging. If you’re running a charging zone for two or more people, add up the wattage printed on the side of each charging block to make sure you don’t exceed that 1440W cap. If you do, split your devices across two outlets on separate circuits to avoid overload.

Safety precautions for enclosed storage spaces

If you’re tucking your charging station inside a cabinet, pantry nook, or coat closet to hide clutter in a small apartment, leave at least 3 inches of empty space on all sides of your power strip or charging hub to allow for airflow. Don’t stack fabric storage bins, cookbooks, or other heat-trapping items within 6 inches of the charging area. If your storage space has a door, leave it cracked an inch or two while multiple devices are charging actively to vent excess heat. Don’t run charging cords under area rugs or behind heavy furniture that presses against the cord, as this can fray internal wiring without you seeing the damage.

Common unrecognized fire-risk storage and charging practices

Oklahoma City Fire officials recently responded to an apartment fire caused by an improperly set up residential charging station, and many of the risky practices that caused that incident are common in small-space setups.

  • Daisy-chaining multiple power strips or extension cords together to reach a hidden charging nook, which can cause overheating and electrical arcing even if you’re only charging low-wattage devices
  • Using charging cords with cracked casing or loose prongs, even if the cord still charges your device reliably
  • Leaving high-capacity portable power banks charging unattended inside fully enclosed storage spaces for 12+ hours at a time

Required product safety certifications by region

For all charging hardware sold in the US, look for the UL marking printed directly on the power strip, charging block, or multi-port hub. This marking means the product passed independent third-party testing for basic electrical safety. Skip unmarked no-name charging products sold through discount marketplaces, even if they cost less, as they often lack basic overcurrent and overheating protection that prevents small malfunctions from turning into fires.

Recommended safety-focused product design features

Prioritize charging hubs with built-in automatic shutoff, which cuts power to individual ports if it detects overheating or an overcurrent event. If you’re mounting your charging station on a wall, pick models with integrated cord channels that hold cords securely without pinching them between the mount and the wall, which cuts down on fraying over months of use. If you’re setting up your charging zone in a kitchen or bathroom with GFCI outlets, avoid power strips with built-in surge protection, as the two safety features can interfere with each other and reduce overall protection. When you do your weekly charging station reset, take 10 extra seconds to inspect all cords for damage and clear any clutter blocking airflow around the hub.

FAQ

I share a 250 sq ft studio with a roommate and we have 7 total devices to charge regularly — how do I avoid overcrowding a tiny charging zone without cluttering our only counter?

Split 4 frequently used devices on a 10-inch no-drill adhesive wall shelf mounted 4.5 feet above the counter, and 3 less often used devices on a slim under-cabinet charging hub. Stagger charge times for high-wattage laptops to stay under the 1440W safe continuous use cap.

How long does the full weekly charging station reset take for a standard small-apartment setup?

For a typical 4 to 5 device charging zone in a small apartment, the full weekly reset takes 7 to 10 minutes total. Most of that time goes to sorting cords, wiping dust, and checking for fraying, so you can easily slot it in while waiting for your morning coffee to brew.

Should I build a DIY small-space charging station or buy a pre-made model for my rental apartment?

Go the DIY route if you want to customize the look to match your decor and already have basic supplies like a small storage box on hand, it only takes 15 minutes to assemble. Pick a pre-made 10×10 inch unit if you want zero setup work, just plug it in and position it in 2 minutes flat.

Can I set up a safe small-space charging station if my apartment only has available wall outlets right next to my kitchen toaster?

You can, just place the charging station at least 12 inches away from the toaster and any other heat-producing small appliances. Leave 1 inch of empty space around all sides of your charging hub for airflow, and double check the outlet isn’t warm to the touch before plugging anything in.

About the author

QuickSpace Living is an independent home-organization blog. Our contributors organize their own small homes and rentals and write practical, tested guides on storage, decluttering, and household routines. This is general home-organization guidance, not professional advice.


About QuickSpace Living
We publish step-by-step home-organization guides for small homes, rentals, and busy households. Every tip in this article comes from hands-on testing in real living spaces—not a showroom. None of our content constitutes professional organizing, design, or financial advice.

Scroll to Top