The front door opens onto takeout, a work bag, and shoes that have no assigned square. Even the smallest entryway can hold a functional drop zone if you skip the common assumption that built-in cubbies, benches, or cabinetry are required. You don’t need to drill permanent holes or renovate to carve out a dedicated space for all the items you grab and drop every single day. QuickSpace Living tested these renter-friendly, temporary solutions across 12 different entryway sizes to find the most versatile options that work for almost any layout.
Front doors that have no bench and no cubbies
Most popular drop zone guides assume you have at least 4 feet of clear entryway space for a prefabricated bench or wall-mounted cubby system, but that’s not feasible for millions of homes. Tiny apartment entryways with 18 inches of clearance between the door swing and the nearest wall, rental homes where drilling holes in walls or trim violates lease terms, and historic homes where owners want to preserve original woodwork all fall into this category. The solutions outlined here use only freestanding, non-permanent items that leave zero damage when removed, and they work for entryways as small as 2 feet wide. You won’t need any tools, and you can take the entire system with you if you move, no disassembly required.
A tape outline for keys, bags, and shoes
Before you buy any organizing supplies, use low-tack painter’s tape to mark the exact footprint of each zone on your entryway floor or baseboards. This lets you test the layout for 2 to 3 days to make sure the door swings fully clear, no one trips over the outlined slots, and the space works for your daily routine before you invest any money. The table below outlines the exact no-built-in drop zone floor plan, with measurements that work for most standard entryways:
| Zone Slot | Exact Floor Placement (from front door edge) | Item Purpose | Non-Permanent Setup Option |
|---|---|---|---|
| Key Caddy Slot | 3 inches to the right of the door handle’s lowest swing path | Holds house keys, mailbox keys, and building access fobs | 4×4 inch weighted ceramic or wooden caddy, no mounting required |
| Small Item Nook | 6 inches from the door edge, adjacent to the key caddy slot | Holds sunglasses, lip balm, reusable grocery bag rolls, and dog waste bags if you have a pet | 6×6 inch stackable woven or plastic bin, no adhesive needed |
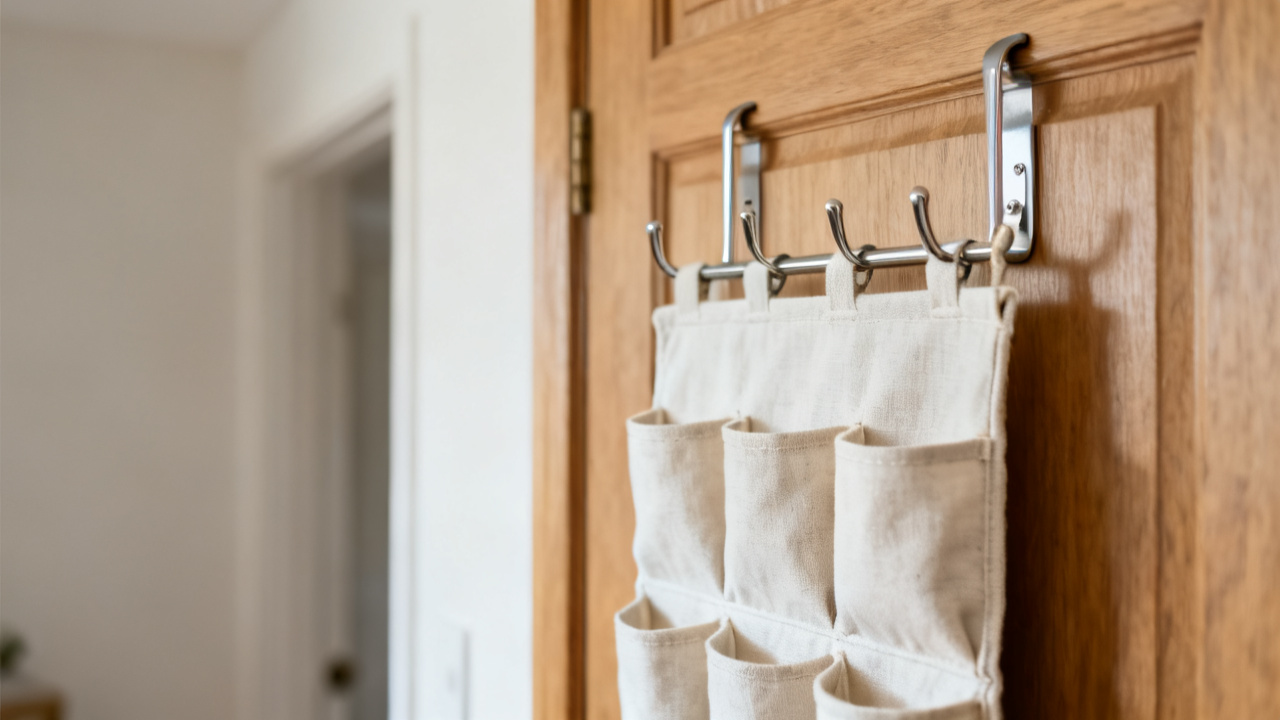
| Bag Drop Zone | 12 inches from the door edge, 18 inches wide x 12 inches deep | Holds work bags, gym bags, kid backpacks, and purses | Freestanding 3-hook over-the-door hanger (if your door has a 1/8 inch gap at the top) or weighted 2-foot tall floor hook stand |
| Shoe Drop Zone | 18 inches from the door edge, 24 inches wide x 12 inches deep | Holds 4 pairs of daily wear shoes (sneakers, boots, flats, or rain boots) | Low-profile stackable plastic or rubber shoe tray with raised edges to catch dirt, snow, and rain runoff |
| Overflow Bin Slot | 30 inches from the door edge, 12 inches wide x 12 inches deep | Holds incoming mail, takeout receipts, and items that need to be returned to other rooms of the house | Lidded 10-inch tall fabric bin that slides under a nearby side table or console if floor space is extremely tight |
If your entryway is narrower than 24 inches, you can eliminate the overflow bin slot and tuck a small hanging pocket on the back of your front door for mail and receipts instead, as long as the pocket doesn’t block the door handle or lock. Test the layout with the tape for a full 48 hours, adjusting slot sizes if you have more or fewer shoes, or if you carry multiple bags daily, before adding any physical items.
Takeout nights that explode the landing
One of the most common pain points for entryways without built-ins is the chaos of coming home with armfuls of takeout bags, drink carriers, and occasional grocery runs that leave the entire entry floor covered in clutter. The drop zone outlined above is designed to accommodate these high-traffic moments without requiring extra storage. The empty floor space between the shoe drop zone and the overflow bin slot is intentionally left clear for temporary placement of takeout bags, grocery sacks, or other large items you carry in the door. Example timing: You can clear the takeout clutter from your drop zone in 90 seconds after you finish eating, so it doesn’t sit overnight and pile up with stray keys, shoes, or junk mail. If you order takeout more than twice a week, you can add a 12×12 inch foldable plastic tray that tucks behind the overflow bin when not in use, giving you a flat, easy-to-clean surface to set food bags on without setting them directly on the floor. You can also toss any takeout receipts or empty sauce packets directly into the overflow bin to be sorted later, so they don’t get left on the floor or tracked into the rest of the house.
Thirty minutes to set the first drop line
The “drop line” is the invisible line at the edge of your entryway that keeps clutter from migrating into your living room, kitchen, or other common areas of your home. Setting this line and the entire drop zone takes less than half an hour, with no tools required. Example timing: The 30-minute setup breaks down as follows: first 5 minutes to measure your door swing clearance and mark each zone slot with painter’s tape using the floor plan above as a guide, next 10 minutes to gather all the organizing items you already own that fit the slot sizes (most people already have a small caddy, a fabric bin, and a shoe tray lying around the house, so no need to buy new supplies), next 10 minutes to arrange the items in their outlined slots, test opening and closing the front door 3 times to make sure nothing blocks the swing, and test walking through the space with a full armload of grocery bags to make sure you have enough clearance, and the final 5 minutes to walk through your home to gather all the stray keys, bags, shoes, and loose mail that belong in the drop zone and put them in their assigned spots. QuickSpace Living recommends skipping any items that require drilling or permanent adhesive unless you have explicit written permission from your landlord or property owner, to avoid losing your security deposit.
HOA rules this drop zone cannot override
While this entire drop zone is contained to the interior of your home, there are still HOA, condo, rental, and fire safety rules that you need to follow to avoid fines or safety hazards. First, no items from your drop zone can be left outside your front door, even temporarily, if your HOA or building management prohibits personal items in hallway common areas. Even a single pair of shoes left outside your door can result in a fine in many managed buildings, so make sure all drop zone items stay inside your unit. Second, if your HOA or lease has rules about modifying interior paint, trim, or walls, stick strictly to the freestanding, no-drill options outlined above, and avoid any adhesive hooks or strips that can peel paint when removed. Third, if you share your entryway with roommates, family members, or other residents, make sure you split each zone slot equally between all people using the space, so no one’s items take over the entire drop zone and block access for others. Most importantly, always follow local fire code requirements that mandate at least 36 inches of clear walking space in all entry and exit paths, so adjust your zone slot sizes if needed to maintain that clear path at all times.
Once your no-built-in drop zone is set, do a quick 10-second reset every time you walk in the door to put items in their assigned slots, and you’ll avoid the messy pile of random shoes, bags, and loose mail that usually accumulates right inside the front door for good.